3D Print Layer Separation: Complete Troubleshooting Guide
You start a print, watch the first few layers go down perfectly, and walk away. When you come back, the print has split cleanly between layers — sometimes halfway up, sometimes near the top. The part looks fine from a distance, but a gentle twist reveals that the layers are barely bonded together.
Layer separation, also called delamination, is one of the most frustrating 3D printing failures because it often happens after hours of successful printing. The good news is that it is almost always fixable. This guide walks through the causes in order of likelihood, from the most common to the most obscure.
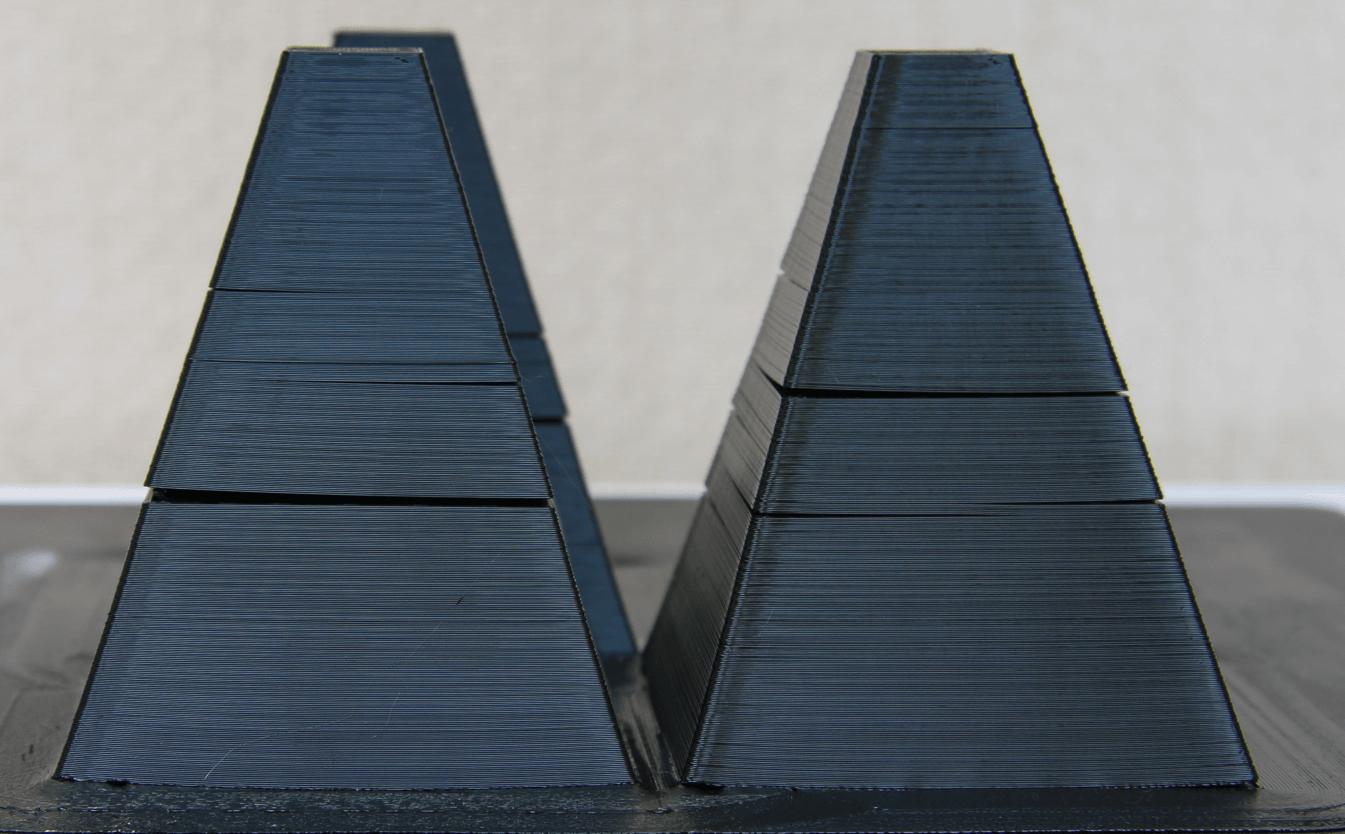
Layer separation occurs when adjacent layers fail to bond properly. The crack follows the print layer lines, which is the telltale sign.
What Causes Layer Separation?
At its core, layer separation happens when the plastic in a new layer does not melt enough to fuse with the layer below. FDM printing works by melting filament and pressing it onto the previous layer. If the previous layer has cooled too much, or the new layer is too cold, the bond is weak.
Think of it like welding. If you try to weld two pieces of cold metal, the joint is brittle. If both pieces are hot and molten, they fuse into one solid piece. 3D printing works the same way — just with plastic instead of metal.
Cause 1: Nozzle Temperature Too Low
This is the number one cause of layer separation, especially with PETG, ABS, and other high-temperature materials. If the nozzle is too cold, the filament does not fully melt, and it cannot bond to the layer below.
How to diagnose: Check the layer lines. If they look rounded and distinct rather than flattened and fused together, the temperature is likely too low. The print may also have a rough, matte finish instead of a smooth, slightly glossy one.
How to fix: Increase nozzle temperature by 5–10°C and run a test print. For PLA, start at 200–210°C. For PETG, 230–245°C. For ABS, 240–260°C. Do not exceed the manufacturer's maximum temperature rating for your hotend.
Cause 2: Cooling Fan Too High
Part cooling fans are great for PLA and overhangs, but they can cause layer separation with PETG, ABS, and ASA. If the fan is blowing at 100% on a material that needs time to bond, the layers cool too quickly.
How to diagnose: Layer separation that gets worse as the print gets taller, especially on thin walls or small features. The bottom layers (where the fan is often off or low) look fine, but upper layers split.
How to fix: Reduce fan speed. For PETG, try 30–50% fan. For ABS and ASA, turn the fan off entirely (0%). For PLA, 50–100% is usually fine, but if you are getting separation, try reducing to 50%.
Cause 3: Print Speed Too Fast
When the printer moves too fast, the filament does not have enough time to melt fully in the hotend. Undermelted filament extrudes onto the previous layer and fails to bond.
How to diagnose: Layer separation that appears in areas where the print head moves quickly — long straight lines, infill, or perimeters on large prints. Slower sections (small details) may be fine.
How to fix: Reduce print speed by 20–30%. If you were printing at 80 mm/s, try 60 mm/s. Also check your maximum volumetric flow rate setting — if it is set too high, the extruder cannot keep up.
Cause 4: Under-Extrusion
If the extruder is not pushing enough filament, each layer is thinner than it should be. Thin layers have less surface area for bonding, and the resulting part is weak and prone to splitting.
How to diagnose: Measure the wall thickness of a test print with calipers. If a 2-perimeter wall should be 0.8 mm but measures 0.6 mm, you are under-extruding. You may also see gaps between infill lines or rough top surfaces.
How to fix: Calibrate your e-steps (extruder steps per mm). Then calibrate flow rate using a single-wall test cube. A 5–10% flow increase is often enough to fix mild under-extrusion. Also check for a partially clogged nozzle — even a partial clog can reduce flow enough to cause separation.
Cause 5: Environmental Temperature
ABS, ASA, PC, and other engineering materials are sensitive to ambient temperature. If the room is cold, or if there is a draft, the print cools too quickly between layers. This is why enclosed printers are recommended for these materials.
How to diagnose: Layer separation that is worse on one side of the print (the side facing a window or AC vent) or worse in winter months. Prints in an enclosure may be fine while open-air prints split.
How to fix: Use an enclosure — even a cheap cardboard or acrylic one helps. Keep the room temperature above 20°C (68°F). Close windows and doors near the printer. Avoid printing ABS in an unheated garage in winter.
Cause 6: Layer Height Too High
Thicker layers mean less contact area between layers. At 0.3 mm layer height with a 0.4 mm nozzle, the layer width is only slightly wider than the height, which leaves a small bonding surface.
How to diagnose: Separation that only occurs at high layer heights (0.28 mm+) but disappears at 0.2 mm or lower.
How to fix: Reduce layer height. For structural parts, 0.16–0.2 mm is a good range. If you need thicker layers for speed, increase line width to 120–150% of nozzle diameter to improve bonding.
Quick Reference: Fixes by Material
| Material | Nozzle Temp | Fan | Common Issue |
|---|---|---|---|
| PLA | 195–215°C | 50–100% | Rare; usually under-extrusion |
| PETG | 225–245°C | 30–50% | Fan too high, temp too low |
| ABS | 240–260°C | 0% | Cooling, drafts, no enclosure |
| ASA | 240–260°C | 0% | Same as ABS |
| TPU | 210–230°C | 50–100% | Under-extrusion, speed too fast |
How to Test for Layer Bonding
Before printing a large part, run a quick bonding test to verify your settings. Print a thin-walled cylinder (50 mm diameter, 100 mm tall, 2 perimeters, 0% infill) at your normal settings. Once printed, try to crush the cylinder sideways with your hand or a pair of pliers.
Good bonding: The cylinder deforms but does not split cleanly between layers. It may crack, but the crack propagates through the material, not along layer lines.
Poor bonding: The cylinder splits apart like a stack of pancakes. Layers separate cleanly with minimal force. This means your settings need adjustment.
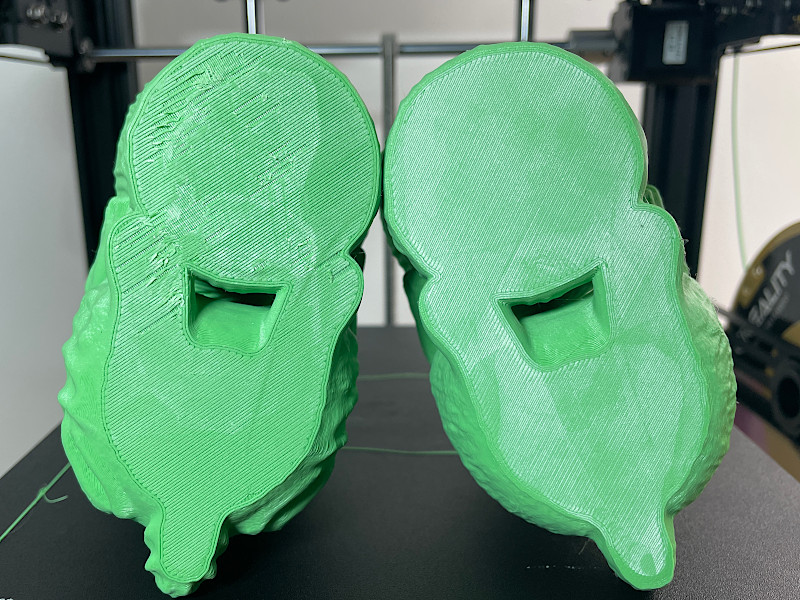
Left: poor layer bonding with visible gaps. Right: proper layer fusion with flat, well-bonded lines. The difference is visible in the first layer.
Another quick test is the "twist test." Print a 100 mm long, 10 mm diameter cylinder. Let it cool fully, then grip both ends and twist. Well-bonded PLA will snap with a sharp break across the layers. Poorly bonded prints will shear apart along layer lines.
Advanced Fixes for Persistent Separation
If you have tried all the basic fixes and still get separation, consider these advanced adjustments:
Increase flow rate by 5–10%. Slight over-extrusion improves layer bonding because more material means more surface contact. This is especially effective with PETG and flexible filaments. Calibrate with a wall thickness test first.
Use a larger nozzle. A 0.6 mm nozzle deposits wider lines with more overlap between layers. Wider lines bond better than thin lines. If you primarily print functional parts, a 0.6 mm nozzle reduces layer separation significantly.
Reduce print cooling for the first 3–5 layers. Even for PLA, keeping the fan at 30–50% for the first few layers helps the initial layers bond before the part cools. Most slicers have a "fan speed at layer N" setting for this.
Check for partial nozzle clogs. A partially clogged nozzle under-extrudes intermittently, causing random layer separation. Run a cold pull or needle clean, then verify flow with a 100 mm extrusion test.
When to Give Up on a Print
If a print has already started separating, it is usually not worth trying to salvage. The weak layer will always be a failure point. Stop the print, diagnose the cause, adjust settings, and reprint. A 30-minute calibration test saves hours of reprinting.