3D Print Not Sticking to Bed? Complete Troubleshooting Guide
You slice a model, hit print, and walk away confident. When you come back, the print is a tangled mess of filament on the bed — or worse, the nozzle dragged the part across the build plate five minutes in. First-layer adhesion is the most common 3D printing failure, and it is almost always fixable.
This guide walks through the causes in order of likelihood. Start with the first fix, test, and only move on if the problem persists. Most adhesion issues are solved within the first three steps.
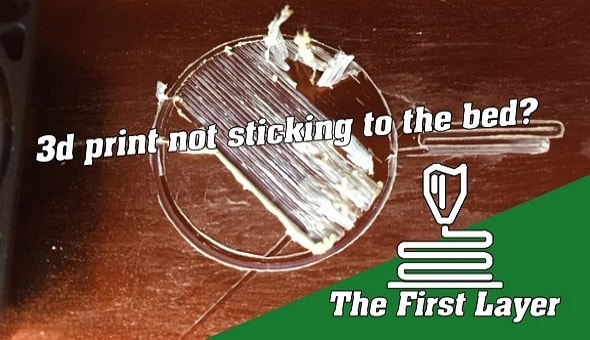
A classic first-layer adhesion failure — the filament does not stick to the bed and gets dragged around by the nozzle.
The First-Layer Foundation
Before troubleshooting, understand what makes filament stick. The molten plastic needs three things:
- Contact: The nozzle must be close enough that the filament is squished against the bed, not dropped from a height.
- Heat: The bed and nozzle must be warm enough that the plastic stays molten long enough to flow and bond.
- Surface: The build plate must be clean and have enough texture or adhesion promoter for the plastic to grip.
If any of these is missing, the print will not stick. Let's go through them systematically.
Cause 1: Nozzle Too Far from the Bed
This is the most common cause by a wide margin. If the nozzle is too high, the filament extrudes into thin air and lands on the bed as a round, thin line that has almost no surface contact. It looks like a loose coil rather than a flat ribbon.
How to diagnose: Watch the first layer. If the filament comes out in round strands that do not flatten, or if you can see gaps between lines, the nozzle is too high. The print may start but lift after a few layers.
How to fix:
- Re-level the bed (manual or auto).
- Adjust the Z offset — decrease it by 0.05 mm at a time to move the nozzle closer.
- Use the paper test: at Z=0, a piece of paper should slide with slight resistance between nozzle and bed.
- Print a first-layer test square and adjust Z offset live while printing.
Cause 2: Bed Not Level
Even if the center is perfect, if one corner is too high or too low, the print will fail in that area. This is especially noticeable with large prints that cover most of the bed.
How to diagnose: The first layer sticks in some areas but not others. One corner may be perfect while the opposite corner has gaps or the nozzle scrapes.
How to fix:
- Run auto-bed leveling (G29) with the bed heated to printing temperature.
- If manual leveling, use the diagonal method and repeat 2–3 times.
- Check that the bed is not warped or bowed — glass beds can develop a curve over time, and spring steel sheets can bend.
- For persistent issues, use a mesh bed compensation with more probe points (5×5 or 7×7 instead of 3×3).
Cause 3: Bed Temperature Wrong
Every material has an optimal bed temperature range. Too cold and the plastic solidifies before it can bond. Too hot and the plastic stays too soft, causing the first layer to spread too thin or the part to warp as it cools.
| Material | First Layer Bed Temp | Remaining Layers |
|---|---|---|
| PLA | 60°C | 40–50°C (or off) |
| PETG | 70–80°C | 60–70°C |
| ABS | 100–110°C | 90–100°C |
| ASA | 100–110°C | 90–100°C |
| TPU | 40–50°C | 30–40°C |
| Nylon | 70–90°C | 60–80°C |
Pro tip: Measure the actual bed temperature with an infrared thermometer. Some printers' bed thermistors are off by 10–20°C, especially with aftermarket beds.
Cause 4: Dirty or Oily Build Plate
Fingerprints, leftover adhesive, dust, or oil from previous prints create a barrier between the filament and the bed. Even a clean-looking bed can have invisible oil residue that prevents adhesion.
How to fix:
- Clean the bed with 90%+ isopropyl alcohol and a lint-free cloth before every print session.
- For PEI sheets, occasionally wash with dish soap and warm water, then rinse thoroughly. This removes accumulated plastic residue and oils.
- Avoid touching the print surface with bare fingers — handle the bed by the edges.
- If using glue stick or hairspray, reapply a thin, even layer. Old, caked-on adhesive is worse than no adhesive.
Cause 5: Wrong Build Surface
Different materials stick best to different surfaces. Using the wrong surface is like trying to stick tape to wet paper — it will not hold.
| Material | Best Surface | Avoid |
|---|---|---|
| PLA | PEI, textured PEI, glass + glue | Bare glass (can fuse) |
| PETG | Textured PEI, glass + glue | Smooth PEI (can weld) |
| ABS | PEI, glass + glue, Kapton tape | Cold surfaces |
| TPU | PEI, textured PEI | Glue stick (hard to remove) |
| Nylon | Garolite, glass + PVA glue | PEI (poor adhesion) |
Cause 6: Cooling Fan Too High on First Layer
Many slicers default to 100% fan from layer 1. For PLA this is usually fine, but for PETG, ABS, and ASA, a full-speed fan on the first layer can cool the plastic too quickly, preventing it from bonding to the bed.
How to fix: Set the first-layer fan to 0% for ABS/ASA, 30–50% for PETG. For PLA, 50–100% is fine. Most slicers have a "fan speed at layer 1" setting — use it.
Cause 7: Drafts and Ambient Temperature
A cold draft from a window, AC vent, or open door can cool the print unevenly, causing warping and adhesion failure. This is especially problematic with ABS and ASA.
How to fix:
- Move the printer away from windows, AC vents, and exterior doors.
- Use an enclosure — even a cardboard box around the printer helps.
- Keep the room temperature above 20°C (68°F).
- For ABS/ASA, an enclosure is essentially mandatory for consistent results.
Cause 8: Nozzle Temperature Too Low
If the nozzle is too cold, the filament does not fully melt, and it cannot flow enough to bond with the bed. This is more common with PETG, ABS, and TPU than with PLA.
How to fix: Increase nozzle temperature by 5–10°C. For the first layer, some slicers let you set a higher nozzle temp (e.g., 215°C for first layer, 205°C for rest with PLA). This helps the initial layer flow and bond better.
Quick Fixes That Often Work
If you are in a hurry and just want the print to stick, try these in order:
- Clean the bed with IPA. This alone fixes 30% of adhesion issues.
- Re-run bed leveling with the bed heated. Fixes another 30%.
- Adjust Z offset down by 0.05 mm. Fixes most of the rest.
- Add a brim or raft. A brim adds surface area and helps the part anchor. A raft creates a sacrificial base layer.
- Apply glue stick or hairspray. For stubborn materials or worn beds.
Material-Specific Tips
PLA not sticking: Usually bed too far or bed too cold. PLA sticks best at 60°C bed with a clean PEI sheet. If PLA is not sticking, something basic is wrong — check leveling and Z offset first.
PETG not sticking: Usually bed too cold (needs 70–80°C) or fan too high (reduce to 30–50%). PETG also likes a slightly closer nozzle than PLA — try Z offset -0.02 mm.
ABS not sticking: Usually bed not hot enough (needs 100–110°C) or drafts. Use an enclosure. ABS also benefits from a brim or raft.
TPU not sticking: Usually bed too cold (40–50°C is enough) or nozzle too far. TPU is heavy and can pull itself off the bed if the first layer is weak. Use a brim.
Bed Surface Maintenance and Replacement
Your build surface is a consumable. It does not last forever, and a worn surface is a common cause of adhesion problems that no amount of leveling will fix.
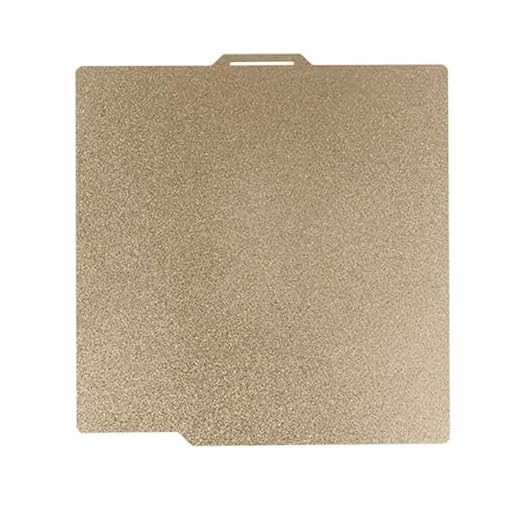
A textured PEI spring steel build plate. PEI is the most popular build surface for FDM printing, but it wears out after 6–12 months of regular use.
PEI sheet lifespan: 6–12 months with daily use. Signs of wear: smooth glossy spots where filament has been repeatedly removed, visible scratches, or adhesion that gets gradually worse over weeks.
Cleaning routine: Wipe with 90%+ IPA before every print session. Wash with dish soap and warm water every 2–4 weeks to remove accumulated plastic residue and oils. Never touch the print surface with bare fingers.
Rejuvenating PEI: If adhesion drops but the sheet is not visibly worn, try a deeper clean. Scrub with a Scotch-Brite pad and dish soap, rinse thoroughly, and dry. This restores the micro-texture that helps filament grip.
When to replace: If cleaning and re-leveling do not restore adhesion, and the sheet has visible smooth spots or deep scratches, replace it. A new PEI sheet costs $15–$30 and instantly fixes most chronic adhesion issues.
Advanced Adhesion Techniques
For stubborn materials or large prints, these advanced techniques improve adhesion beyond basic settings:
Brim: A single-layer outline around the part adds surface area and anchors the edges. Use a brim of 5–10 mm for parts with small footprints or materials prone to warping (ABS, ASA). Brims are easy to remove after printing.
Raft: A thick, grid-like base layer under the part. Rafts provide the best adhesion but leave a rough bottom surface and waste material. Use rafts only for very large ABS prints or when brims are not enough.
Adhesion promoters: Glue stick (PVA), hairspray (Aqua Net is the classic), or commercial products like Magigoo and Dimafix. Apply a thin, even layer to a clean bed. These work especially well for PETG on glass and ABS on PEI.
Enclosure: For ABS and ASA, an enclosure raises the ambient temperature, reducing warping and improving first-layer adhesion. Even a cardboard box around the printer helps. For PLA and PETG, an enclosure is unnecessary.
First-layer flow calibration: If your first layer looks good but still lifts, try increasing first-layer flow by 5–10%. More material means more squish and more surface contact. Most slicers have a separate "first layer flow" or "initial layer line width" setting.
When to Replace the Build Plate
PEI sheets wear out. After 6–12 months of regular use, the surface becomes smooth and glossy from repeated prints, and adhesion drops. If cleaning and leveling do not help, and the sheet is visibly worn or scratched, replace it. A new PEI sheet costs $15–30 and instantly fixes most chronic adhesion issues.